Monthly Archives: December 2017

Minor Bulbs: Perfect Partners for Early Spring Color

A garden stroll in the early spring offers a great deal of promise but generally little color. You can rectify this with a little planning and planting this fall to ensure bright spring blooms to enjoy.

What Is a “Minor” Bulb?

Often passed over at the garden center for showy, larger-flowering bulbs, minor spring bulbs give the garden a head start on spring, extending the season by blooming as early as February and March. These beautifully blossomed seasonal gems are short in stature and produce daintier flowers but, when planted en masse, make as powerful a statement as any daffodil, tulip or hyacinth planting.

Chionodoxa, Muscari, Eranthis, Galanthus and other minor bulbs are planted at the same time as tulips, daffodils and hyacinths, and in the same way, although not so deeply. The general rule of thumb is to plant bulbs three times as deep as the bulb is high. Your soil should be well drained so the bulbs do not rot. Don’t forget to include bone meal in the planting hole for strong growth in the spring.

Minor bulbs make perfect partners for all of your other traditional spring-flowering bulbs. Their size makes them suitable for rock gardens and walkways, as well as filling in spaces between other spring bloomers. They also naturalize well and will help fill in any gaps in a spring garden or wildflower lawn.

Top Minor Bulbs

There are many lovely bulbs with smaller, stunning spring flowers to choose from. Some of the most popular and versatile options include…

  • Chionodoxa (Glory of the Snow): Small, 1 inch white-centered blue or pink flowers appear on leafless stems. Plant in large groups in front of early blooming shrubs or naturalize in the lawn. When grown in shade, blooms last several weeks. Plants grow 4-10 inches tall.
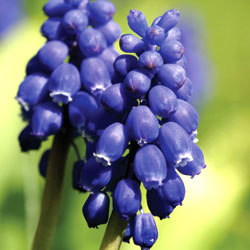
  • Muscari (Grape Hyacinths): Offering the rare and cherished blue color in the garden, Muscari have small spherical blossoms bunched into triangular clusters on top of delicate 6-9 inch stems. Grape hyacinths are available in various shades of blue, purple and white.
  • Eranthis (Winter Aconite): A relative to the buttercup, Eranthis unfolds bright yellow, honey-scented blossoms that can carpet the chilly ground and bring life to a dormant rock garden. Plants grow 2-4 inches tall.
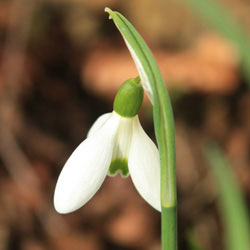
  • Galanthus (Snowdrops): The cold is no deterrent to the bell-shaped frosty white flowers of Galanthus. This plant thrives in light shade under leafless trees and is well suited to random planting amidst tough grass. Shorter varieties grow to 4 inches while giant snowdrops reach 10 inches.
  • Leucojum (Giant Snowflake): Drooping bells of white or pink flowers with green tips adorn this frost-hardy 4 inch plant.
  • Pushkinia (Striped Squill): The white flowers of this plant look light blue because of the blue stripes on the petals. Plant in sun or partial shade in well-drained soil. Striped Squill grows 6-8 inches tall.
  • Scilla (Spanish Squill): This late spring-flowering plant has multiple stems with up to 12 bells on each stem. Colors are blue, pink and white. Scilla needs adequate moisture in the flowering season as it grows to 10-12″ in height. Plant in full sun or partial shade.
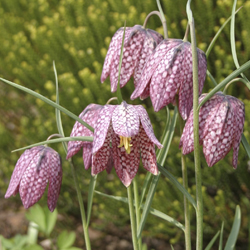
  • Frittilaria meleagris (Checkered Lily): This small Frittilaria grows to only 9 inches tall compared to its sibling Frittilaria imperalis (Crown Imperial) that grows to a height of 3 feet. The checkered lily’s name is derived from its checker-patterned petals.

Any of these smaller, less obtrusive bulbs can make a great early spring statement in your garden or landscape, bringing it to life long before most spring blooms are at their peak.

snowdrop_250x250

checkeredlily_250x250_3

hyacinth_250x250

Kale, the Super Food

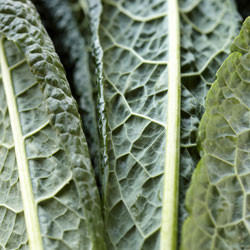
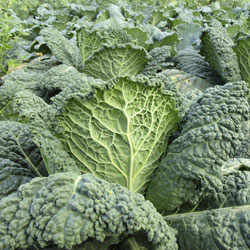
Did you know kale is a super food? Kale belongs to the same family as cabbage, broccoli and Brussels sprouts. It is a rich source of vitamins C, A, & B6, and is loaded with manganese, calcium, copper and potassium, with no fat or cholesterol. Add it to your garden for a healthy harvest!

Planting

In the fall, set out transplants or sow kale seeds about 6-8 weeks before first frost in deep rich soil. Kale will need at least 6 hours of sun per day. Enrich your planting soil with plenty of compost. Planting kale in nutritious soil will promote faster plant growth and thus provide a tender, richer crop. Soil pH should be between 6.5 and 6.8. Sow seeds roughly one-half inch deep and thin seedlings to 8-12 inches apart to provide adequate air circulation. When thinning kale shoots, however, bear in mind that larger spacing will produce larger plants, larger plants produce larger leaves and larger leaves are generally tougher. Keep soil moist and mulch to control weeds. Water when planting and during dry spells.

Harvesting

Don’t worry about frost harming your harvest, a light frost will only enhance the sweetness of kale. Harvest the outer leaves of kale as they are needed for salads and recipes. Young tender leaves will grow from the center of the plant. Use the young leaves for salads and keep older leaves for cooking, which will help tenderize those larger leaves. Kale will continue to produce throughout fall in the warmer sections of our area. In low lying areas or where it is colder, use floating row covers or low tunnels to extend the life of your kale. Kale will bolt (elongate) and flower in the spring. This signifies the end, and it is time to pull it up and compost the remaining plant.

Cooking

Kale may be used fresh or frozen. It may be steamed or stir-fried, or used in soups, stews, omelets and casseroles. It is a tasty base for salads or can be added to sandwiches. It may be used in recipes as a replacement for spinach and collard greens. It even makes fantastic chips!

Kale Chips

  • Preheat oven to 425 degrees Fahrenheit.
  • Clean Kale and spin dry. Remove all the tough stems.
  • Drizzle about 8 cups of leaves with one tablespoon of olive oil and toss to coat.
  • Place Kale leaves in a single layer on a parchment lined cookie sheet.
  • Bake for 10-15 minutes or until leaves are crisp but not scorched.
  • Remove from oven and immediately sprinkle with generous amount of flaky sea salt.
  • Devour!

With so many tasty options for kale and so many nutritional benefits from this super food, there’s no excuse not to add this easy-to-grow dietary wonder to your garden!

kale_close_250x250

kale_250x250

Fairy Garden Magic

Do you think your tiny balcony terrace means you can’t have a grand garden? Are you looking for a clever and imaginative way to introduce a child to the world of plants? Have you ever dreamed of your own “McGregor’s Garden?” One of the newest gardening trends can do all these and a whole lot more!

Start planning…and playing…in your fairy garden!

About Fairy Gardens

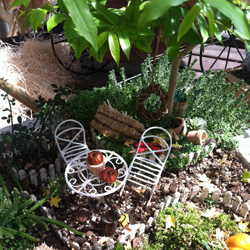
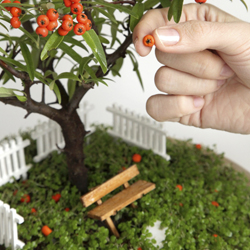
One of the newest gardening trends, fairy gardening is the new-and-improved miniature gardening of yesteryear with all sorts of new products, idea books and plants. Despite their small size, the themes, designs and creativity of these tiny garden spaces is boundless. Any container, nearly any type of plant and any type of design can add a bit of garden magic even to a tiny space. Go small and have fun.

Designing a Fairy Garden

You can create your fairy garden just about anywhere. For portability, consider a pot, basin or terrarium. Or, for a more rustic appeal, plant an old lunchbox, garden bucket or child’s wagon. Old shoes, a stack of broken pots, a rusty wheelbarrow or a concrete bird bath are other great planting options.

Fairy gardens can be positioned anywhere. A smaller design can be a fun centerpiece to patio furniture, or it can be part of an entryway display. To heighten the intrigue, find a secret place in your own garden to lure the garden fairies. Between tree roots, beside a water feature or in a grove under flowering shrubs… The possibilities are endless.

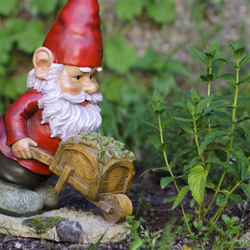
Design the overall look of your fairy garden just as you would a larger garden. What is its theme? Is it a fantasyland for unicorns? A gnome family farm? A replica of your own big house? It can be anything you imagine. Consider tiers, layers and depth as well to create a truly impactful scene in your miniature fairy world.

If you’re having trouble coming up with an idea, visit your garden center to check out all the products. If you need some inspiration, our Enchanted Garden products by Grassland Road will get you started. Whimsical and charming, they’ll help you create your own mini-fantasy scene. From arbors and benches to umbrellas and miniature tools, the possibilities are amazing. If you’re not sure your resident garden fairies will understand your invitation, you can always buy a mannequin fairy to entice them to share the fun.

This visit also sets the mind whirling with ideas for plant materials. Consider the mixture of colors, textures, shapes, and scents… in miniature. Tiny groundcovers such as moss or creeping thyme create beautiful “lawns.” Pebbles become paths. Sand creates shores. Twigs make houses, fences and other structures. What can you do with a small pinecone or acorn? How can you recreate a Disney-type pumpkin carriage?

Creativity knows no limits, and the fairies will love you for it!

minigarden_250x250_3

gomegarden_250x250

minigarden_250x250

Healthy Soil: Winter Cover Crops

It’s fall and our annual and vegetable gardens are winding down for the season. Now is the time to invest a little extra time and effort to prepare your soil for next year. Whether your garden is large or small, all annual planting beds will benefit from the addition of a winter cover crop.

Benefits of Cover Crops

A cover crop is a fast-growing, low-maintenance crop that can be used to protect your garden and landscaping beds in fall and winter. Depending on the crop you choose, it can provide many benefits to your garden, including…

  • Stabilizing soil and preventing erosion
  • Adding organic matter back into the soil to nurture later crops
  • Adding nutrients to the soil that have been used by previous crops
  • Suppressing disease that can wither new crops even before they start
  • Repressing weeds that will take over a garden
  • Improving soil structure with aeration and better drainage
  • Encouraging beneficial insects that will help later crops

Recommended Cover Crops

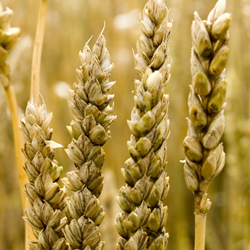
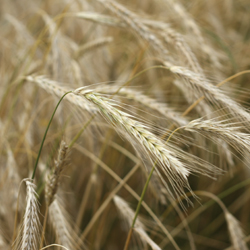
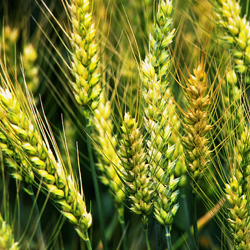
Different cover crops work best in different areas, and the climate, soil type and growing season will help determine which cover crops will work best for your gardening needs. The most popular recommended cover crops for our area are oats, rye and wheat.

  • Oats
    Sow 6-8 weeks before the first hard frost. Planted early, oats will provide a quick covering with the added benefit of providing an early planting time for next spring’s crops. Oats are not winter hardy, but they will grow in the fall and die in the winter, leaving behind nutritious mulch that will easily decompose when incorporated into the soil in the spring. This is a great cover crop choice for low- or no-till gardens. Sow at 2 lbs. per 1,000 sq. ft. for the best coverage.
  • Winter Rye
    Sow 2-4 weeks before the first hard frost. This is a good choice for gardeners who have late season crops and don’t want to cut off that last harvest. If hardened off before frost arrives, winter rye will continue to grow over the winter. Rye is a vigorous grower and can be difficult to turn in the spring, so bear that in mind depending on what crops you will be planting in spring. Sow at 3-4 lbs. per 1000 sq. ft. for appropriate coverage.
  • Winter Wheat
    Sow 2-4 weeks before the first hard frost. Wheat will cover quickly but is not as aggressive as winter rye. Winter wheat is also leafier, making it easier than winter rye to turn into the soil in the spring. Sow at 3 lbs. per 1000 sq. ft. to provide good coverage.

Cornell University provides a tool to assist you in choosing the correct cover crop for your situation. (https://covercrops.cals.cornell.edu/decision-tool.php)

Planting Cover Crops

Before planting a cover crop, clean out garden beds, removing all roots and plant material. Compost all plant matter that is not diseased. Broadcast seed evenly and cover with soil. Water thoroughly when planting and when necessary during dry periods. In the spring, till or fork oats into the planting bed and you are ready to plant. For winter rye and wheat, mow or chop tops 4 weeks before planting leaving cut cover crop on top to dry. Till or fork dried wheat and rye into the bed before planting.

With the appropriate cover crop, you can protect your garden’s most valuable asset – the soil – and be sure it is ready for spring planting.

oats_250x250

rye_250x250

wheat_250x250

Winter Pond Prep Checklist

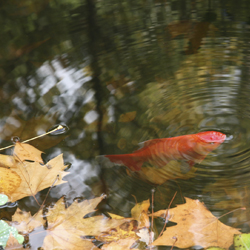
Your pond can be an attractive and valuable focal point of your landscaping, but it can also be a delicate one. As winter approaches, certain steps should be taken to ensure plant and fish survival so your pond will still be at its best next spring.

  1. Clean Out Debris
    Use a netted scooper, a rake, your hands and, if possible, a pond vacuum to clean out pond debris. Rotting vegetation produces gas under winter ice that can be fatal to fish, frogs or other aquatic wildlife. This is also a good time to reduce any mud coverage over the pond’s bottom.
  2. Trim Pond Plants
    Trim and move hardy pond plants to the deep end of the pond (minimum 18” depth) to prevent them from freezing. Cut their vegetative growth back to about one inch above the soil line. Extra foliage will be more delicate and could rot over the winter. Especially be sure to trim any foliage that is already broken, wilting or damaged.
  3. Remove Tropical Plants
    Tropical plants or any delicate vegetation should be removed from the pond and placed in a basement or garage where they will not freeze. Keep plants moist throughout the fall and winter months until it is time to return them to the pond.
  4. Disassemble Summer Equipment
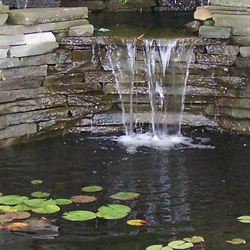
    Remove and clean the pond pump and waterfall or fountain feature (if applicable). Store them inside for the winter. See your maintenance guidelines for proper storage recommendations to keep the equipment in peak condition.
  5. Clean Pond Filter
    Thoroughly clean the pond filter and inspect it for any damage. If necessary, repair or replace the filter.
  6. Change Fish Diet
    Feed fish with spring/autumn food mixtures to provide good nutrition for their slowing metabolism. Stop feeding them completely when temperatures drop consistently below 50 degrees Fahrenheit. Avoid overfeeding, which would contribute to excess debris and decay in the pond over the winter.
  7. Set Up Pond Heater
    If needed, set up your pond heater for winter use. Test the equipment to be sure it is functioning properly and make any repairs or adjustments as needed.
  8. Cover the Pond
    Cover your pond with netting, screening or a shade cloth to minimize debris that will fall into the water throughout the winter. Secure the perimeter with sod staples or rocks to prevent the covering from blowing away. This will make spring cleanup and restarting your pond much easier.
  9. Relax until spring!
    Your pond will be ready for warmer temperatures when you are.

pond_250x250_2

pond_250x250_1

The Great Squirrel Battle for the Bulbs

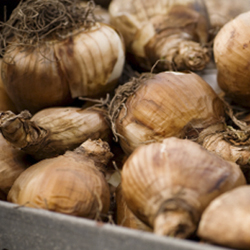
Autumn is the catalog time of year, when gardeners devour and drool over the spring-blooming bulb catalogs, eagerly fantasizing about next year’s flowerbeds. We picture drifts of crocus and gaily swaying tulips, lush daffodils and glorious hyacinths. Snowdrops, irises, daylilies… Ah, the garden will be great this next spring.

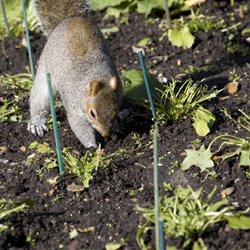
Then we remember last spring – hours of labor and dozens of bulbs meticulously planted, but only one or two emerged to flaunt their blooms. What happened?

Squirrels and Bulbs

Squirrels like flower bulbs just as much as gardeners, but unfortunately not for their beauty. From the looks of the remains – chewed remnants, dug up holes, battered foliage – those bulbs became expensive squirrel food. Fortunately, if you want to plant daffodils, alliums, scilla, hyacinths, squills or fritillaria, your bulbs should be safe. Generally, squirrels don’t eat these. But how can you protect the bulbs that make the tastiest squirrel treats?

Keeping Squirrels Out of the Flowerbeds

Go ahead and order your bulbs. While you’re waiting for delivery, decide which of the three basic methods you will use to prevent the squirrel attacks. A small investment of time and materials will protect your bulbs.

  1. Mesh Barriers
    Wire mesh is the best protection to keep squirrels away from bulbs. Dig the hole for several bulbs, make a “cage” using mesh around the bulbs and fill in the soil. If the squirrels dig, the mesh will prevent them from eating the bulbs. You may also plant the bulbs as usual and place a layer of mesh on the soil. You’ll have to secure it to keep it in place then cover with mulch. Be sure the mesh layer is wide enough so squirrels cannot easily dig around the sides to reach the bulbs.
  1. Repellants
    Garden centers sell many different squirrel repellants, and deer repellants also repel squirrels. Some gardeners swear to the effective use of red pepper flakes mixed in the soil around, and over, the bulbs. Many squirrels don’t like spicy tastes, but pepper flakes may need to be replaced after heavy spring rains to be the most effective.
  1. Sharp Gravel
    Adding sharp gravel to the soil around and over the bulbs also deters squirrels from digging. Not only do they not like the feel of the gravel on their sensitive paws, but the gravel – which is heavier than dirt or mulch – is more difficult to move, so the bulbs stay safer.

There is another option to keep squirrels away from bulbs without completely discouraging their visits. If you can’t beat ’em, join ’em – because squirrels look for the easiest food sources, a squirrel feeding station stocked with corn and peanuts may be just the thing to keep the squirrels from looking for your buried treasures!

squirreldigging_250x250

bulbs_250x250

Glorifying Garden Gloves

Many gardeners believe garden gloves are easy to do without. Those of us who love gardening enjoy the feel of soil running through our fingers, and we don’t mind the line of dirt under our fingernails. We prefer to not have anything impede the dexterity needed to sow small seeds or pinch a plant, and we like the textures of the plants we cultivate. We would rather spend our budgeted gardening dollars on the latest herbaceous sensation rather than unnecessary gloves, and, frankly, nobody likes sweaty hands.

Why Gloves Matter

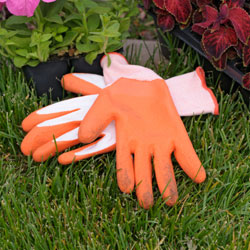
Despite the prejudice against covering our hands, gloves are the single most important piece of garden clothing that a person should own. In addition to the fact that they come in every color and pattern under the sun, making them an attractive and matching accessory to your garden wardrobe, garden gloves provide many benefits, such as…

  • Improving your grip on tools, minimizing accidental drops that can damage expensive tools.
  • Keeping hands warm in cold weather so we can garden in comfort even in early spring or late fall.
  • Keeping hands dry in wet weather to prevent skin irritation and problems that could limit our gardening.
  • Preventing contact with animal waste that may carry bacteria, mites or other pests that could harbor diseases.
  • Helping avert calluses and blisters that can make even simple gardening tasks painful and unpleasant.
  • Protecting hands from cuts, splinters and thorn pricks from aggressive plants so we aren’t limited in our gardening choices.
  • Preventing contact with poisonous plant oils that cause rashes and allergic dermatitis.
  • Keeping nails clean and help prevent nail breakage so our hands can be as beautiful as our garden.
  • Protecting from soil borne fungal and bacterial infections that could be spread around the garden easily.

With so many great reasons to use garden gloves, which ones should you choose?

Selecting Gloves

Gardening gloves come in an almost limitless array of colors, styles and patterns. Features may include…

  • Different types of fabric or weave densities that affect air circulation to keep hands cool and comfortable
  • Anti-slip grips or rubber palms and fingers for excellent traction in all types of gardening conditions
  • Broad, wide cuffs for an easy fit or snug, form-fitting cuffs for a secure fit that won’t let in any dirt or debris
  • Different sizes and proportions to suit men, women and children

With so many gloves on the market there’s a style available for every garden chore, season, weather condition, hand size and preference. Check out our selection today. We are happy to help you choose a pair or two that work best for you and your gardening needs.

gloves_250x250

Japanese Beetle Reduction Methods

Japanese beetles can be a scourge of the garden and landscape, but what can you do to keep these pests at bay?

About Japanese Beetles

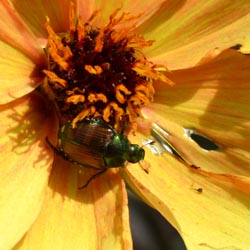
Japanese beetles (Popillia japonica) spend their early lives as underground grubs eating turf grass roots. They prefer well-watered, healthy perennial ryegrass and hard fescues in full sun. Emerging as adult beetles in mid-June through July, they begin feeding on over 200 varieties of plants, including shade and fruit trees, shrubs and ornamentals. They also mate and the females lay 50-70 eggs in the soil.

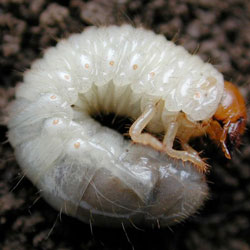
The eggs hatch in the fall and white C-shaped grubs begin eating roots. Autumn is the best time to check your lawn to see if the grubs are present. Dig several one-foot squares 6″ deep in your lawn, turning over the turf and looking for these distinctive grubs. If you find them, taking action immediately can help control the infestation.

Reducing Japanese Beetle Populations

Non-chemical preventative treatments include spraying beneficial nematodes such as Heterorhabditis or Steinernema onto moist lawns and soil in September. Nematodes, naturally occurring soil organisms, are parasitic to soil grubs and many insect larvae, including Japanese beetles. Spray in the evening and ensure the soil is moist to at least 6″ deep. One product, Lawn Guardian, contains two types of nematodes; one lives deeper in the ground to give a “double whammy” to the feeding grubs.

Natural predators include ground beetles, ants and Tiphia, a parasitoid. Applying Bacillus popilliae Dutky to the soil causes “Milky Spore Disease” to the grub. Chemicals to control the grubs include trichlorfon, imidacloprid, halofenozide or thiamethoxam, so look for pesticides that include these compounds to help eliminate Japanese beetles. Neem oil can also be helpful to control these pests. As always, read and follow the directions carefully when using any type of chemical pesticide.

In the garden, row covers can help minimize Japanese beetle populations during the growing season, but this can also reduce crop productivity as fewer flowers are pollinated. Still, if an area is heavily infested with Japanese beetles, a smaller crop may be a better alternative than accidentally nurturing these pests. If only a few beetles are present, hand-picking them off plants and killing and disposing of the insects – toss them in a bucket of soapy water – can keep the populations manageable.

For the latest information and updates on Japanese beetles, as well as more control tips, contact your favorite garden center or County Agent.

beetle_1JapaneseBeetle_2

Fall Horticultural Oil Application

Autumn is an excellent time to apply horticultural oil. The oil smothers many soft-bodied insects and hard-shelled scales that are impenetrable to many insecticides, and can therefore help control some of the most stubborn insect populations. But is it right for your plants?

About Horticultural Oil

Horticultural oil, or hort oil, is typically derived from petroleum, and is a type of ecologically-friendly mineral oil. Some cottonseed and soybean oils can also be effective horticultural oils. Emulsifying agents are typically added to these oils so they can be mixed with water and used as a spray, which helps distribute them evenly over plant foliage to be most effective.

Pests That Don’t Like Horticultural Oils

Different types of horticultural oils can be effective against many unwanted garden pests, including…

  • Spider mites
  • Aphids
  • Whiteflies
  • Mealy bugs
  • Psyllids
  • Lace bugs
  • Caterpillars

In addition to smothering the larvae or insects directly, the heavy oil also makes it difficult for many insects to crawl therefore starving them to death and preventing them from spreading diseases from plant to plant. Additionally, the oil repels many insects looking for winter homes. The oils also act as fungicide against powdery mildew, rust and leaf spot on some plants.

Applying Horticultural Oils

Application of horticultural oils is easy, requiring only a simple hose-attached sprayer. Because oil and water do not mix, frequent agitation by shaking is required even if the oils are mixed with other agents to be more sprayable. These products are most effective if applied when plants are dormant, since oil-based products can burn and harm actively growing foliage, buds, flowers and fruit. Some lighter weight, summer-formulated oils are available, but they should be used only sparingly and only if absolutely necessary. Autumn and winter are the best seasons to apply horticultural oils when insects are a problem, though autumn applications can occasionally cause problems with plants dying back and other winter damage. Because the oils can evaporate and dissipate quickly, they should only be used when insects are present, otherwise they will be ineffective. In freezing weather the oil coverage will be inconsistent, so cool but not bitterly cold temperatures are best.

Of course, always follow the instructions for proper application rates, plant sensitivity and ideal weather conditions to ensure the most effective treatment. Because these oils are still pesticides, protective gear such as gloves and goggles should also be worn to avoid accidental irritation or more severe contamination.

Using hort oils can be a great way to control insects on your plants, but only if the oils are used appropriately. Come in for a consultation to see if these products can help end your insect problems.

FallHortOIl_1

Repotting Houseplants

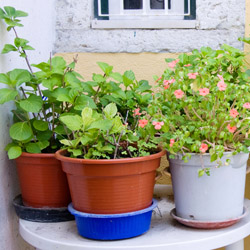
Fall is an excellent time to repot many houseplants. Potted plants that have been growing outdoors during the summer have probably grown quite vigorously due to the high light levels and greater humidity. If the top growth of the plant has increased in size by 20 percent or more, it probably should be transplanted into a larger container so the roots can stretch and settle comfortably.

Before You Repot

Before repotting, check the plant and the soil carefully for insects.  Add systemic granules to the soil and spray the leaves with an insecticidal soap to remove any unwanted pests. If an insect infestation is particularly bad, it may be necessary to remove most of the plant’s soil and replace it with fresh potting soil. Avoid using soil from the garden, however, which will harbor insect larvae and eggs as well as weed seeds and other material you do not want in your houseplants.

Acclimating Plants

Bring your plants indoors well before any danger of frost for proper acclimation to the indoor environment. The change in light levels and humidity could shock more delicate plants, and they may wilt temporarily or drop leaves before they adjust to the new conditions. If possible, bring them in just a few minutes at a time for several days, gradually increasing their indoor time to several hours before keeping them indoors all the time. Flowering tropicals will also benefit from cutting back some of their foliage to avoid shock before being brought indoors.

To help houseplants overcome the transition from outdoors to indoors, position them in a bright, sunny area and consider adjusting indoor temperature and humidity controls to more closely mimic outdoor conditions. Make adjustments slowly and gradually, and the plants will adjust.

Time to Repot

Once your houseplants are adjusted to their indoor fall and winter environment, they can be safely repotted without adding to their stress. Repot the plants early in the day, and move them to a slightly larger pot. Avoid jumping several pot sizes, which could lead to excessive root growth while the foliage is neglected. Be sure to fertilize and water the plants appropriately to provide them proper nourishment as they settle into new pots. Do not expect luxuriant foliage growth right away, however, as it will take some time for the plants to begin growing again, especially in fall and winter when most houseplants are entering a dormant, slow growth period.

By repotting your houseplants in fall, you can help healthy, vigorously growing plants adjust to a new environment and continue their growth with ease in a new, larger, more comfortable pot.

Repotting_1